March 16, 2017

Photoshop Cheatsheet for Beginners

Photoshop Cheatsheet for Beginners

When you're starting out as a graphic designer you usually have a lot of ideas you'd like to explore and just want to get going creating amazing work. The problem is you don't know how to use Photoshop yet so you may end up spending hours toiling away at some seemingly small task to get your design the way you want. It can be kind of frustrating because it feels like it should all just be so much easier to do.  To make it simpler to understand Photoshop as you're starting out, here is a handy cheatsheet including all the basic and essential information you'll want to know. Soon enough, Photoshop will be second nature and part of your creative flow.

Open an Image

To open an image in Photoshop you just have to go to File > Open and then navigate to the folder where the image is stored. If you want to use shortcuts you can use Ctrl/Cmd+O.

Layers

Layers are where the magic happens with Photoshop. A Photoshop composition is made up of many layers. On each layer is a part of the artwork. You could have text on one layer, a shape on another, and a photo you imported on a third layer. Using Photoshop essentially involves the organization and grouping of these layers.
A way to understand layers is to see your Photoshop artboard as something you are looking into from the top down. You can imagine the layers like stacked transparent skins, like vellum, that are only opaque where a layer object exists. You are looking down into the stacked layers when you look at your design.
To open and close the Layers window choose F7.

Zoom In

If you're working on a design or illustration with a lot of detail you're going to want to zoom in on the work to make it pixel perfect. In order to do that you can choose the Magnifier Glass icon at the bottom of the tools menu or click Ctrl/Command and the plus or minus key. To open the Zoom window select Capital Z.

Ctrl/Cmd+Alt+Mouse-Click

This shortcut is so useful it must be highlighted—Ctrl+Alt and Mouse-Click allows you to select anything on the artboard, on any layer, and move it around. It makes it possible to use Photoshop to create layouts and compositions in a fluid, more natural way, and similar to how one moves objects in Illustrator. If there is one huge time-saver that enables you to create work quickly and on the fly it's this shortcut.

Customize your Workspace

Photoshop comes with a variety of preset workspace options that arrange the app's windows in ways that are optimized for a different art and design tasks. You can choose from Essential, Painting, Typography, Photography, among others. The windows will rearrange to showcase the ones you would need most. To access workspaces go to Window > Workpace and choose one. To create a new custom Windows workspace of your own go to Window > Workspace > New Workspace.

Set a Document's Preferences

Photoshop provides a lot of customization for documents. You can set these options within the document preferences. Common preferences to change include the document's units and ruler setting and how much memory the program uses. To set preferences go to Edit > Preferences for Windows or Photoshop > Preferences for Macs.

Setting Color

Photoshop makes it easy to work with a variety of color types like RGB, CMYK, and Pantone and also convert colors between different systems. In Photoshop, you can also easily set foreground and background colors and create swatches for your projects of commonly used colors.
To access the color picker click on the foreground swatch on the Tool menu or choose F6.
Once you have the color picker open you can set your own color by entering numerical values for HSB, TGB, Lab, or CMYK colors. Alternatively, you can move the slider and change colors within the spectrum on the left-had side of the window.

Using Brushes

Brushes are a great way to make a Photoshop piece appear more realistic, add texture, and increase visual interest. A whole slew of brushes exist for Photoshop like linocut, calligraphy, spray, and watercolor. If you are an illustrator, brushes are particularly useful for enhancing your projects. To access the brushes choose F5 or choose the brush icon on the Tool menu.
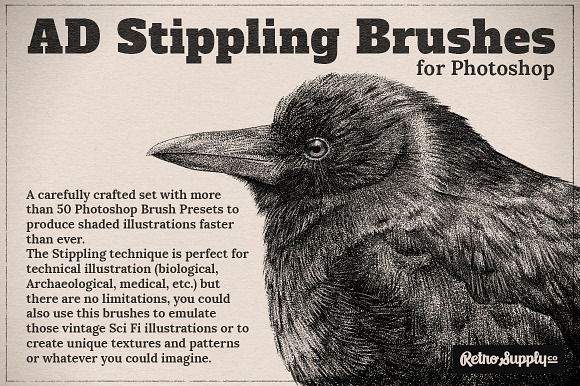
Retro Supply Co's AD Stippling Brushes for Photoshop emulate this beautiful vintage brush style invented by Guilio Camagnola in 1510.

Changing Text

The Text tool makes it easy to change the fonts in use in your project and also create typographic designs within shapes, along custom paths, or to display vertical type. To access the options for typographic design choose the T tool or choose the Character window.
Once you install a new font, like the lovely Smoothy cursive script from Ian Barnard, it will appear in the dropdown menu in the Character window.

Add Some Effects

Photoshop has a lot of visual effects presets you can add to your artwork and design as well, many compared to other Creative Suite applications. Some common and useful ones include Blur, Sharpen, and Despeckle. You can also find artistic and bold ones like Spherize, Color Halftone, and Solarize. To access the effects choose the Filter menu.
It's possible to install new effects to your version of Photoshop as well. True Grit Texture Supply has a great product called Distress Press that includes a variety of visually appealing distressing effects for Photoshop projects.

Photoshop Shortcuts

A key way to speed up your ability with Photoshop is to use shortcuts. It's not necessary to use or even know all of them, but here are ones that are more commonly used and easier to remember.

TOOL SHORTCUTS

Move tool     V
Hand tool     H
Zoom tool     Z
Lasso tool     L
Magic Wand tool     W
Crop tool     C
Eyedropper/Color Sampler tool     I
Ruler tool     I
Pencil Tool      B
Pen tool     P
Type tool      T
Eraser Tool     R
Gradient tool     G
Healing Brush tool     J
Dodge, Burn & sponge tool     O
Shape tool     U

COMMAND SHORTCUTS

Image Size:
Window     Alt+Ctrl+I
Mac     Opt+Cmd+I
Canvas Size:
Window     Alt+Ctrl+C
Mac     Opt+Command+C
New Layer:
Window     Shift+Ctrl+N
Mac     Shift+Cmd+N
Merge Layers:
Windows     Ctrl+E
Mac     Cmd+E
Merge Visible:
Windows     Shift+Ctrl+E
Mac     Shift+Cmd+E
Group Layers:
Windows     Ctrl+G
Mac     Cmd+G
Select All:
Windows     Ctrl+A
Mac     Cmd+A
Draw Straight Lines:
Windows     Alt-click with Lasso tool
Mac     Option-click with Lasso tool

Use Free Transform:
Windows     Command+T
Mac     Ctrl+T

Source: Creative Market Blog
March 30, 2016

Photoshop Time-saving Tips

  1. Press Tab to hide the toolbar and palettes. Shift + Tab will hide palettes only.
  2. Use Shift + left click on the blue stripe of the toolbar or on the palettes to move them to the side of the window.
  3. Double click on the upper blue stripe in any palette window to minimize it.
  4. Double click on the gray background to open an existing document, while Shift + double click will open Adobe Bridge.
  5. Tired of the dull gray background? Click the Paint Bucket Tool, then Shift + click on the background, and it will change to the color you chose for your foreground.
  6. To select all layers press Alt + Ctrl + A.
  7. Caps Lock will change your cursor to a sharper cross.
  8. Press F to choose from three different display options, which will allow you to make the workbench larger.
  9. To draw a straight line with a brush or pencil, click once at the beginning of your line, and then Shift + click at the endpoint.
  10. Press and hold Ctrl to change any tool to Move Tool; release to change it back.
  11. Use Ctrl + Alt + click to create a copy of an image and move it with your cursor.
  12. Press and hold Space to change any instrument to Hand Tool; release to change it back.
  13. Use Ctrl + Space + click to zoom in; Alt + Space + click to zoom out.
  14. Press Ctrl and + or  to zoom in or out by percentage points.
  15. Hold Alt with the Eyedropper Tool, and you can take a sample for your background color.
  16. Draw a line with the Measure Tool, then press and hold Alt and draw a second line out from the endpoint of the first one to measure the angle between them.
  17. Press Ctrl + Alt + Z or Ctrl + Shift + Z to undo or redo a number of actions.
  18. Use Alt + Backspace and Ctrl + Backspace to paint the image in the foreground or background color, respectively. Shift + Backspace brings up the Paint Bucket window. Alt + Shift + Backspace or Ctrl + Shift + Backspace will paint your image in the foreground or background color, respectively, while leaving transparent patches as they are.
  19. Holding Alt and Free Transforming with Ctrl + T will transform a copy of the object, while Ctrl + Shift + T will repeat the most recent transformations.
  20. The size of the canvas can be easily increased with the help of Crop Tool — expand it over the canvas borders and press OK.
  21. Pressing Ctrl + J creates a copy of the current layer.
  22. Ctrl + Shift + E collates all visible layers, while Ctrl + Shift + Alt + E collates a copy of all visible layers into one new layer.
  23. Select Marquee Tool and hold Alt to make the starting point the center of a selection.
  24. Use Ctrl + D to undo selection and Ctrl + Shift + D to redo it.
  25. When you create a selection with the Marquee Tool, hold Space to move the field and release to continue selecting.
  26. Pressing Shift and + or  changes the layer blend mode to Normal, Dissolve, Multiply, Screen, or Overlay.
  27. With Brush or any other tool chosen, you can change the layer transparency by pressing a number on the keyboard — press one key, e.g. 4, to change transparency to 40%. To make it more precise, press and hold 7 and then press 2 to get 72% transparency.
  28. To hide all layers except the current one, hold Alt and click the eye icon near the Layer icon on the Layer palette.
  29. A color sample can be taken not only in Photoshop, but outside it as well. Resize the Photoshop window so that you see the image to take a sample from, select the Eyedropper Tool, click inside the Photoshop window, and drag the cursor outside.
  30. Choose a layer, hold Alt, and click on the border between the upper layer and the current one to create Clipping Mask, thus the upper layer will be visible within the lower one, and the lower one will replace the mask.
  31. Click Create new layer on the Layer palette while holding Alt to open the window with new layer settings.
  32. Choose a layer, hold Alt, and click on the Trash Can icon on the Layer palette to delete the selected layer without asking.
  33. File > Automate > Contact Sheet II — this command will create a short preview for each file that is currently opened in Photoshop in a separate document, and sign them.
  34. The settings of Move Tool have the Auto Select Layer option, depending on the place you click.
  35. While working with Move Tool, press Alt + Shift + right click on different image objects on different layers, and you will be able to select all those layers.
  36. Select Grid, drag the upper left corner with the Grid Scales, and the count will start from the place where you released the mouse button. Double click in the upper left corner to reset the starting point to its default position.
  37. Create a path with Pen Tool, and hide/show it with Ctrl + Shift + H.
  38. These are the hotkeys for RGB, CMYK, Indexed color Channels:
    Ctrl+"~" = RGB
    Ctrl+1 = red
    Ctrl+2 = green
    Ctrl+3 = blue
    Ctrl+4 = other path
    Ctrl+9 = other path
    Ctrl+"~" = CMYK
    Ctrl+1 = light green
    Ctrl+2 = pink red
    Ctrl+3 = yellow
    Ctrl+4 = black
    Ctrl+5 = other path
    Ctrl+9 = other path
    Ctrl+1 = Indexed
    Ctrl+2 = other path
    Ctrl+9 = other path
  39. Hold Ctrl and expand the red rectangle in the Navigator palette, thus zooming in on the image.
  40. Hold Alt and click on any step in the History to copy that step.
  41. Press Alt and drag a step from one Action to another to make a copy of this Action.
  42. The Lens Flare filter (Filter > Render > Lens Flare) allows you to set exact coordinates by holding Alt and clicking the Preview window.
  43. Hold Shift + Alt to transform an object proportionally, i.e. from the center outwards.
  44. If you select Move Tool and then want to copy something, press and hold Alt and drag the image. Holding Shift + Alt allows you to easily move along the Gridlines.
  45. If you want to level the horizon or uneven outline after scanning, select Measure Tool, draw a line along your curve of choice, then go to Image> Rotate Canvas> Arbitrary. Photoshop will set the angle by itself, and you just need to press OK to correct the image.
  46. When drawing in Illustrator, copy and paste your image in Photoshop, and it will ask you whether you want to save it in pixel or Shape format.
  47. Press Ctrl + R to show the Rules panel.
  48. To center the image precisely, press Ctrl + A, Ctrl + X, Ctrl + V.
  49. Pressing Ctrl + E blends the current layer with the one below it.
  50. Select Brush Tool and change the brush diameter by pressing [ and ].
  51. Double click on the Zoom Tool to return the level of zoom to 100%, while double clicking Hand Tool will expand the image to fit the screen.
  52. When working with a text, press Ctrl + H to hide the selection of symbols that are already selected.
  53. If you have some symbols selected, click in the Choose Font Type window and use keyboard arrows to choose your font type.
  54. Using Alt + left or right arrow changes the symbol spacing by 10, while Ctrl + Alt + left or right arrow changes it by 100.
  55. Using Ctrl + Alt + T creates a copy of the object you want to transform.
  56. Using Ctrl + Alt + up, down, left, or right arrow copies the current layer and moves it by 1 px.
  57. Change your active layer by pressing Alt + [ or ].
  58. Move the active layer up or down using Ctrl + [ or ].
  59. Press Ctrl + to hide Gridlines.
  60. Ctrl + [+] zooms the image in, while Ctrl + [-] zooms it out.
  61. Ctrl + Alt + [+] increases the size of the window and zooms it in, and Ctrl + Alt + [-] reduces and zooms out.
  62. When using the Polygonal Lasso Tool, press Backspace to undo the most recent step.
  63. Press X to exchange the background and the foreground colors.
  64. Press D to reset the foreground and the background colors to the default values of black and white.
  65. Press F5 to show the Brushes settings palette.
  66. Press F7 to show the Layers palette.
  67. Use Ctrl + left click on the Layer icon in the Layer palette to select the layer contents.
  68. To see the contents of the layer mask, hold Alt and left click on it.
  69. Alt + left click on the Create Layer Mask icon creates a black mask.
  70. When using Polygonal Lasso Tool, hold Shift to draw straight lines with a 45 degree angle tick.
  71. Press Ctrl + G to group the selected layers and organize your work neatly.
  72. Press Ctrl + Shift + N and create a new file with a dialog window pop-up, while pressing Ctrl + Shift + Alt + N will create a new layer in the file you are working with.
  73. The [ and ] keys reduce or increase the Brush size, respectively; Shift + [ or ] change its hardness.
  74. Press Alt to transform Burning Tool into Dodge Tool, and vice versa.
  75. Stamp Tool clones patches of an image (Alt+click to define the patch to clone). This also works even when you have several images opened in Photoshop, or you can clone any selections from any other images — just place them where you can see them on the screen.
  76. Use Ctrl+click on the Layer icon to create object selection in this layer. If you need to select more than one object in several layers, hold down Shift as well.
  77. To blend all the palettes into one, drag the tag of any tab to other palettes and tags, and it will move where you show it.
  78. Pressing Enter while working with the text will create a new line, and Ctrl + Enter or Enter on the digital keyboard will end writing.
  79. You can place a layer on any other open image in Photoshop — this is how a layer copy is created. Hold Shift while dragging to center the layer contents.
  80. Create a new 500×500 px Photoshop file, create a new layer, select Brush Tool with a standard round brush of any diameter, and put a dot in the upper middle part of the image (like the 12 position on a clock). Press Ctrl + Alt + T to create a copy of the dot, which will allow you to transform it. Drag the Pivot Point, the dot in the center of the transformed object, and put it right into the center of the image, then write an angle of 30 degrees and press OK. And now for the magic! Press Ctrl + Shift + Alt + T ten times, and you’ll see it!
  81. You can choose any layer with Move Tool by clicking the necessary part of an object while holding down Ctrl.
  82. Add yet another layer to a layer group by holding Ctrl + Shift and clicking a part of the object located on another layer.
  83. You can delete several layers at once by simply dragging a group of layers to the Trash Can icon in the Layer palette.
  84. Delete the current layer by holding Alt and pressing L three times.
  85. Having applied a filter, you can lighten it up with Fade by pressing Shift + Ctrl + F.
  86. Hold Alt and drag a layer mask to another layer to copy the mask.
  87. A vertical Gridline can be easily transformed into a horizontal one, and vice versa, by selecting Move Tool, holding Alt, and left clicking the Gridline.
  88. When you use Save for Web, your document information is lost. To preserve it, use Save As.

Source: Bright Side

January 18, 2016

How Ink Is Made

How Ink Is Made by The Printing Ink Company

"A Chief Ink Maker shows how colour and ink is created from the raw ingredients-powder, varnish, and passion. Everything designers and printers need to know about the process, the challenges and joy of ink making."